Sunday, February 12, 2012

A Hearty Breakfast For the Weary and Cold -- Challah Soy French Toast with Creamy Cinnamon Sauce and a Mixed Berry Compote + Italian Tofu Scramble

Guys, it's pretty cold here for Atlanta.  I mean, it feels pretty frigid, considering we've had less than 10 cold days this entire winter season.  And what better to do on a cold day than to eat hearty, comforting foods with friends? :)  Regretfully, I forgot to take pictures of our meal, but I'll try to make do in words and provide pictures of what I THINK the food looked like, courtesy of Google images (thank you, once again, oh mighty Google!).

I had some buddies from the PhD program come over yesterday morning for a late brunch / lunch.  I had some killer french toast last weekend at The Flying Biscuit, so I decided to make a lactose-intolerant-friendly version of it with a few dipping sauces.  I actually think making french toast with soy milk makes it more decadent -- soy milk has a natural sweet creaminess that goes well with this dish, in my opinion.  I also think it's crucial to choose thick slices of a bread that is naturally sweet and delicious on its own -- this is why I went with fresh-baked challah from the local bakery.  Oh, and what REALLY makes the difference between an 'eh, ok' french toast and a 'WOW!!  DELICIOUS!!" french toast is letting the pieces of sliced challah sit in the egg mixture for an hour or so before pan-frying.  This allows the bread to soak up as much flavor and moisture from the batter as it can before cooking.  Personally, I think dipping or topping french toast with a sweet sauce or syrup makes it over-the-top hearty and delicious on a crisp winter morning, so I made two sides to go with it -- a warm, comforting mixed berry compote and a creamy cinnamon sauce.

I also decided to attempt an Italian tofu scramble, which was inspired by some friends who invited me over for dinner last week.  They just had another baby 7 weeks ago, so they had me over for dinner so I could get a chance to hold baby Elijah, and play with their older son, two year old Benjamin (both cuties, by the way).  They've been experimenting with a lot of new recipes lately and mentioned that we would be having kale, cauliflower, and tofu scramble that night.  My eyebrows furrowed and I scratched my head curiously.  "TOFU scramble?!  I.e. a vegan take on scrambled eggs??  Never thought about trying that!"  And indeed, it turned out to be fantastic, especially with the contrast in textures between the cauliflower and tofu.  And the tofu was surprisingly not slimy when scrambled; it eventually dries into a moist crumble after sautee-ing for a few minutes and readily soaks up the delightful flavors in the pan around it like a sponge.  Not only was this an easy, cheap recipe that was full of protein and fiber, it is also a great vegan-friendly option for any guests with dietary restrictions!  I had to try a variation of it at home!  So I decided to go with an Italian theme; a combination of baby portabello mushrooms, roma tomatoes, garlic, and fresh basil would surely spice up the tofu scramble and make it a comforting winter dish on a Saturday morning.  I was a little worried about things getting too watery because mushrooms and tomatoes retain so much moisture, but it surprisingly turned out great.

Of course, I had to balance these two heavy dishes with something light and sweet, so I made a simple fruit salad with sweet kiwis, strawberries, and grapes.  Enjoy the recipes for all three dishes below!  Bon apetite!


Ok, so I think the french toast looked like something like this.
Plus, I have theseexact Corelle plates at home.  Hooray!


The mushroom, tomato, and basil tofu scramble probably looked a little
less dry than this, but you get the general idea.  Got to compromise a
little if you're getting your pictures from Google images!!
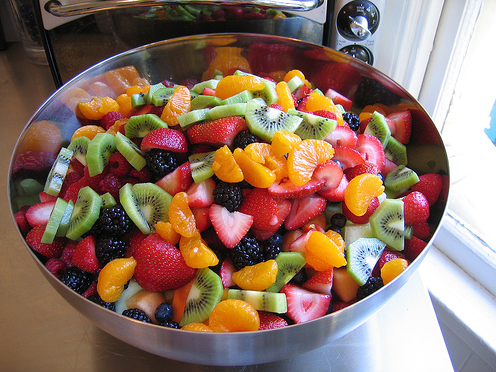
Ok, so the salad didn't look EXACTLY like this, but it was still delicious. :)


RECIPES:


FRENCH TOAST:

Ingredients:
-1 loaf of challah bread
-3 eggs
-1 cup soy milk
-1 tbsp vanilla extract
-4 tablespoons brown sugar
-1 tbsp of ground cinnamon
**Note: As always, the above measurements are rough approximations.  I never measure anything when I cook.  Just use your best judgment as you add ingredients.  

Preparation:
-Slice the challah bread into roughly 1 1/2 inch thick slices (I ultimately used 6 slices for the mixture below)
-Combine eggs, soy milk, vanilla extract, brown sugar, and cinnamon in a LARGE bowl with a wide mouth (this is key, since you have to let the bread soak in the mixture) and whisk until well-mixed.  
-Dip the challah pieces in the bowl and make sure both sides have been exposed and covered in the egg mixture.  Let the mixture sit with the slices of challah for at least an hour in the fridge.
-Pre-heat oven to 200 degrees and place a baking dish lined with aluminum foil in it -- this is an underutilized technique used to keep foods warm that require a long time to make a whole batch (e.g. pancakes, waffles, french toast, etc.).  
-Pan-fry each piece of bread for 1 1/2 - 2 minutes on each side; when golden brown, slide the toast onto the baking sheet in the oven to keep it warm.  

FRENCH TOAST DIPPING SAUCES:

1. CREAMY CINNAMON SAUCE:

Ingredients:
-1-1.5 cups heavy cream
-maple syrup
-brown sugar
-2 tablespoons vanilla extract
-1 tablespoon ground cinnamon
-2 tablespoons flour (as a thickener)
**Note: maple syrup and brown sugar measurements were purposefully not given because I just poured stuff in without thinking about it.  Use your best judgment.  I prefer more maple syrup than brown sugar because of its unique, comforting, wintry flavor, but that is personal preference.  

Preparation:
-Combine all ingredients into a small saucepan on stovetop at medium heat until it starts to boil.  Immediately reduce heat to low and continue to cook until mixture retains the desired thickness.  
**Note: If I had to make this again, I might add crushed pecans to the creamy mixture; it would add some texture, plus pecans have a sweetness that makes it such a unique nut.  

2.  MIXED BERRY COMPOTE

Ingredients:
-2 small container (or 1 large container) of fresh blueberries
-1/2 container of fresh strawberries
-2 tablespoons of vanilla extract
-1 fresh cinnamon stick
-brown sugar
-1 cup of water

Preparation:
-Combine all ingredients into medium-sized saucepan.  
-Stir mixture every few minutes (and squish the fruit using a large spoon or fork) on medium-low heat for about 1.5-2 hours.  It's one of those things that just has to sit and meld together.  
-Remove from stovetop when compote has reached desired thickness.  
**Note: This makes enough for an entire jar of berry compote; you can re-use for other things, or it makes a great homemade gift!


ITALIAN TOFU SCRAMBLE:

Ingredients:
-1 block tofu
-4 baby portabello mushrooms (or use any other mushrooms that you like; I just got whatever was on sale)
-1 bunch of fresh basil
-2 small roma tomatoes
-Salt/pepper to taste
-1 tablespoon olive oil
-3-4 cloves of fresh garlic

Preparation:
-Crumble a block of tofu with your hands (this is the fuuuuuuun part!) into a large bowl
-Mix in thinly diced tomatoes and mushrooms, thinly sliced basil (about a handful) and garlic, and salt and pepper to taste.  
-Pan-fry the tofu mixture (lid off!!) for about 20 minutes with olive oil until the scramble loses most of the moisture from the mushrooms and tomatoes.  
-Voila!  Enjoy!

Sunday, February 5, 2012

Finger-Lickin' Good Cornish Hen + Roasted Garlicky Fingerling Potatoes

So, here's the situation, guys.  I'm a little embarrassed to say it.  Maybe everyone has their nightmare dinner party/get together story, but here's mine -- I've baked cornish hens probably 983092384 times and the ONE time I messed it up, I had two of my wonderful friends, Matt and Sarah, over for a nice dinner.  I don't even know what happened!  It was a complete disaster.  I took the chicken out of the oven when I thought it was done and it was hard as a rock.  I thought I hadn't cooked it long enough (it had been about an hour or so), so I stuck it back in to cook for another 20-30 minutes.  To my shock and dismay, I took the chicken out of the oven, only to find it even harder and drier!  I mean, I could have thrown that thing at the wall and it might have smashed into pieces, it was so tough and gamey.  This was my fail-safe tandoori chicken recipe, too.  What a disappointment!  Anyway, I have vowed to them many times that I'd make it up to them.  I still have yet to have them over for a "redo" chicken dinner, but I have a perfect new recipe to try with them; for fun, I'm going to call it the "Finger-Lickin' Good Cornish Hen."  This creation was actually inspired by a link I saw for the "Engagement Chicken" recipe.  You know that saying, "The way to a man's heart is through his stomach"?  Well, apparently this recipe is so spectacular that your beau will fall down on one knee and propose to you in a heartbeat.  Ok, so I saw this and immediately rolled my eyes.  I practically gagged when I scrolled to the bottom and saw the bit about the "Marry me juice" at the bottom of the pan.  Trust me, guys.  I'm not out to make food for my partner every night to impress him.  Heck, I made a cornish hen last week so I COULD HAVE IT ALL TO MYSELF, darn it.  I really did!  I mean, I'm all about making people happy with food, but pu-lease!

Regardless, I glanced through the list of ingredients for this recipe, then quickly decided to take my own route.  I was, however, inspired by the recipe's use of lemon to season the chicken.  But, as you all probably know by now, I'm terrible at following recipes, which is why the only thing I have ever been able to bake is a batch of Victoria's famous pumpkin muffins (no improvements necessary - it's too good!).  So, I of course improvised and added some shallots, a handful of chopped rosemary, a tablespoon of melted butter, and plenty of sea salt.  Not to toot my own horn or anything, but the final product -- pure awesomeness.  It was juicy.  It was moist.  It was a party in. my. mouth.  The key was, in my opinion, baking the chicken while covered.  This allowed the chicken juices to collect in the pan and marry with the other seasonings.  The roasted fingerling potatoes, which were lightly seasoned with some olive oil, salt, and chopped garlic, was a perfect side to the chicken.  If I had to change one thing, though, I would probably bake the cornish hens over a bed of the potatoes so they absorb the flavors from the all of the chicken juices.  Stuffing the chicken with some potatoes sounds delicious, too, but cornish hens are so tiny that this might be a difficult feat to pull off.  Below is the recipe -- enjoy!!

Finger-lickin' good cornish hen with a side of roasted fingerling potatoes
and fresh, sweet blood oranges.  Absolutely delightful!!


FINGER-LICKIN' GOOD CORNISH HENS

Ingredients (Note: I only made 1 cornish hen, but the recipe below is for 2):

-2 cornish hens
-1 whole lime (I personally like the flavor of lime over lemon; just personal preference, though)
-4 shallots
-salt to taste
-2 tablespoons butter
-2 fistfuls of rosemary

Preparation:

-Thaw the cornish hens and WASH THOROUGHLY.
-Chop the shallots and rosemary finely.
-Melt butter in the microwave.
-Salt each cornish hen generously.
-Cut the lime into fourths.  Rub the squeeze of 1 lime wedge around and inside 1 cornish hen (2 wedges for both).  REALLY rub the wedge into the skin of the chicken and the inside cavity.
-Carefully insert 1 (unsqueezed) lime wedge into the cavity of each of the cornish hens.
-Pour 1 tablespoon of butter on each of the cornish hens and rub the chopped shallots and rosemary all over the hens (both inside and out).
-As a public health student and practitioner, I do NOT advocate eating raw meat products.  However, I say you can never tell how good your meat will be unless you taste the seasoning. :)  I like to just rub one of my index fingers on the chicken and lick; if I think something is off, I adjust the flavors.  Mind you, I don't do this like 50 times.  Only once or twice, and only to get the balance just right.
-Bake in a 375 degree pre-heated oven for 45 minutes (about 20-25 minutes on each side).  Make sure the chicken is covered with a piece of foil.
-After 45 minutes, remove the foil covering the chicken and bake uncovered for an additional 20 minutes.
-Note: The amount of time you need to bake the chicken depends on how much meat you have; I believe the general rule is to bake each pound of chicken for 15-20 minutes?

ROASTED GARLICKY FINGERLING POTATOES

Ingredients:

-A bowl full of potatoes (I don't know!  I'm bad at amounts, sorry)
-5ish cloves of garlic
-Salt
-2 tablespoons olive oil

Preparation:

-Finely slice the potatoes and place on a baking pan.
-Combine finely chopped garlic, salt, and olive oil with the potatoes and mix well with hands.
-Bake in a pre-heated 375 degree oven for about 45 minutes.
-Enjoy!


Sunday, January 29, 2012

Creamy Mushroom Medley Soup With Leeks

This week's culinary adventure was inspired by Joe, whose favorite soup is creamy mushroom.  For this dish, I envisioned slow cooking several varieties of meaty mushrooms in a creamy broth seasoned with soothing, wintry herbs.  So off I went to the Buford Highway Farmer's Market, which has twice the selection of mushrooms as Kroger, Publix, and Whole Foods combined at at least half the price.  Seriously, friends, I wish I could have snapped a picture of all of the different types of mushrooms!  I was so overwhelmed.  I did my best to pick what I could out, and ended up with a cart full of button, shiitake, maitake, oyster, and enoki mushrooms.  Holy cow!

Next came the fun part -- cleaning the mushrooms.  Folks, mushrooms are not easy to clean, but they should be washed thoroughly since dirt tends to cling to them.  It took a good half-hour to properly rinse a sink full of delectable fungi, but it was worth it.  I roughly chopped the larger mushrooms and threw them in a crock pot with water, chicken bullion (see appropriate measurements on box/bottle so your soup does not end up too bland or salty!), leeks, garlic, chives, (a very small amount of) rosemary, and a generous amount of salt.  Oh, and to make it creamy, I added some 2% milk and 2 tablespoons of butter.  

The soup did turn out pretty well!  Based on this experience, I decided that when life gives you mushrooms and leeks, one should COMBINE THEM TO MAKE SOUP!  Mushrooms and leeks are like salt and pepper, avocados and lime, butter and toast.  I've convinced myself in my head  that leeks bring out that delicious glutamate-y, umami flavor that I crave while eating mushrooms.  I'm not completely clear on the science of the umami taste and glutamates, though, since the umami taste is something really intangible and difficult to identify.  Umami generally translates to "savory, brothy flavor" due to (usually naturally occurring) glutamates in a food (I know, what does that even mean?  See tangent**).  Regardless, my point is, mushrooms and leeks proved to be a stellar combination.  Each creamy bite of the soup had a variety of these delicious, meaty, hearty fungi swimming in a flavorful broth.  Adding the milk and butter gave the broth a bit of sweetness and actually brought out the savory flavors of the other ingredients.  

Overall, it wasn't a bad first try, but if I had to make improvements to the recipe, I would add a cup of rice to make it a bit more hearty, as well as a little flour to thicken the broth.  Overall take-home message: This is a great dish to prepare quickly in a large crock-pot just before you leave the house for several hours.  I can guarantee that you will come home to a lovely, aromatic kitchen.  See the finished product, as well as the modified recipe, below.  By the way, don't be alarmed by the amount of mushrooms used; these delightful vegetables contain a great deal of water and tend to shrink significantly when cooked.  Oh, and you certainly don't have to use the varieties of mushrooms in this recipe; use whatever is on hand at home or available at the grocery store (within a reasonable price bracket -- mushrooms can be expensive!).  

[**Tangent:  Most people label monosodium glutamate, or MSG, as an artificial chemical that is used in large amounts in soy sauce-based foods and french fries when, in fact, MSG is a naturally occurring compound that results when sodium, water, and glutamate combine.  Glutamate is an amino acid that is commonly found in fish, meats, mushrooms, and even parmesan cheese!  While I think MSG sensitivities are completely legitimate, I think they more than likely occur when someone is exposed to exorbitant amounts of it in terrible restaurant food, where they are forced to use bottled MSG to make people think their food tastes better than it actually is.  Why do I think this?  Because if you have eaten any of the above mentioned foods containing glutamate, you have consumed MSG at some point in your life.  In fact, we all consume it on a daily basis; it's just that we all intake varying amounts.]


Ingredients:

-6-8 oz button mushrooms
-6-8 oz shiitake mushrooms
-6-8 oz maitake mushrooms
-6-8 oz of enoki mushrooms
-6-8 oz of oyster mushrooms
-1 stalk of leeks
-3 shallots
-3 cloves of garlic
-a handful of chives
-1 small sprig of rosemary (Note: rosemary is a delightfully aromatic spice.  However, in large amounts, rosemary can be extremely bitter and overwhelming, and can easily overpower any dish.)
-chicken bullion (use according to instructions; use as much as appropriate for the amount of liquid -- water + milk -- added to the soup)
-salt (to taste)
-4-5 cups water
-3-4 cups milk
-2 tablespoons butter
-1 cup of rice
-1/4 cup flour

Preparation:

-Wash all mushrooms thoroughly.
-Dice all mushrooms (except enoki -- you can just cut the ends off those) into 1 inch-ish cubes.
-Finely chop shallots, garlic, leeks, chives, and rosemary
-Combine mushrooms and herbs/spices into a large crock pot with water, milk, chicken bullion, flour, butter, and salt to taste.  (Believe me, the butter makes the whole dish come together and makes it even more comforting -- I don't recommend taking that out of the recipe!)
-Cook 1 cup of rice on stovetop or microwave separately.  
-Leave crock pot on high for about an hour (but watch the mixture carefully to make sure the milk does not boil over), then set on low for several hours.
-About 30 minutes before serving, add rice to the soup.  Adding the rice later (as opposed to throwing it in with the other soup ingredients in the beginning) (1) prevents the rice from using the soup broth to cook and (2) ensures the rice does not become "wilty" (I like my rice to have texture in soups instead of it melting into the soup, but that is personal preference).  
-Serve while hot; can add a bit of shaved parmesan cheese, but this is certainly optional.
-ENJOY!

Wednesday, January 25, 2012

Happy Chinese New Year!

I'm a bit late on wishing everyone a prosperous Chinese New Year, but better late than never, I suppose.  In celebration of the upcoming year of the dragon, my roommate's parents came up to visit and cook a nice meal on New Year's Eve.  Sorry, nice meal is an understatement.  What I really mean is, they cooked an incredibly delicious meal comprised of fifteen-ish (or more; I lost count after a while) dishes for Yan Ping, Joe, and myself.  My pictures don't do the meal any justice at all, since there were too many dishes to fit within the digital frames!!  Also, Yan Ping's mother kept cooking throughout the meal as well.  She ate with all of us towards the end, but she kept adding more and more dishes to the table as we were eating.  You can imagine how stuffed we all were by the time we got to dessert!  Unfortunately, I am still learning bits and pieces about Chinese cuisine so I will try my best to describe what we ate.

The main showpiece of the meal was the "hot pot."  Essentially, it is a pot of boiling water with lots of yummy vegetables, fish, and meats.  "Hot pot" is sort of a family-style meal, where everyone adds (and subsequently cooks) various vegetables, meats, and seafood in the constantly boiling soup.  It's almost like fondue, but with a large vat of soup.  And the longer you eat (and cook), the yummier the entire concoction becomes.  By the end of it, the hot pot becomes an incredibly flavorful broth filled with cilantro, cabbage, pork, potatoes, fish balls, and cuttlefish.  Two thumbs up!

There is no possible way I can describe everything, honestly.  But the dishes that stick out in my mind include pea shoots with ginger, mu shu pork (!!), pickled eggs and pork, duck with green pea sauce/gravy, and homemade pork dumplings.  All were delicious, but the mu shu pork and pickled eggs and pork stood out the most to me.  What a star chef Yan Ping's mother was that night!  Both her parents toiled all day to put together this delicious meal.

The most intriguing tradition I experienced during the meal was the presentation of the steamed fish.  Every year, a whole fish is displayed with the New Year's Eve meal spread, but not eaten until the next day (New Year's Day).  The idea is that something must be left for the new year as good luck.  Each and every one of the dishes we ate that night had a special significance, too.  Unfortunately, I can't remember everything -- I wish I did!  Regardless, it was a wonderful night spent with wonderful people.  Thanks to Yan Ping and her parents for hosting!  Everything was delicious and I learned a lot!

The spread -- one end of the table.
You can see the steamed fish and the duck on the end there.  

The spread -- a better shot of the hot pot and sides that we
cooked in it (e.g. cilantro, pork, bean sprouts, tofu, squid).

Saturday, January 21, 2012

Chana Masala: Ultimate Winter Comfort Food

Folks, I discovered something -- when you actually listen to the doctor and stay off your foot when you're injured, YOU ACTUALLY HEAL FASTER.  Yeah, you're thinking, "It took you nearly 28 years to figure that out?"  But, let's be honest folks, runners are the worst at heeding medical advice.  Anyway, I am doing a lot better now -- I'm nearly walking normally; probably still can't run for a few weeks, but progress is progress.

Anyway, earlier this week, I wanted to cook something nice for Joe and my roommate to thank them for (a) putting up with my mopey mood and (b) helping me out in my gimpy state the first few days after my injury.  At the same time, I wanted to avoid standing up for long periods of time and risk bearing too much weight on my right ankle.  I decided on making a simple but comforting chickpea soup, often called "chana masala."  In Bengali cuisine, we have a similar dal soup we call "ghugni," which is essentially used interchangeably with "chana masala," but it actually uses a slightly different lentil than chickpeas.

The reason I crave chana masala in the winter (which in Atlanta, we have had virtually none of this year) is that it is thick, spicy, and hearty.  I season my dal heavily with ginger because it just screams comfort.  Whenever I want to just crawl into my covers because of the weather or I feel sick, all I want is ginger.  Cold weather or not, though, chana masala is a perfect side dish, main entree, or afternoon snack.  It is the kind of meal/dish you might prepare in the morning and leave on the stove for several hours to let the flavors marry together.  And boy, is it worth the wait.  Here's the recipe below.

Spicy, chunky, wholesome chana masala.  

Ingredients:

-15-25* oz of garbanzo beans**
-1 large roughly chopped tomato
-7-8 cloves of finely chopped garlic
-fresh ginger root (can store as frozen)
-1 small finely chopped onion
-fresh cilantro
-1 cinnamon stick
-6-7 cloves
-4-5 cardamoms
-1 teaspoon turmeric powder
-salt/pepper
-crushed red pepper
-ghee
*Obviously, not exact measurements.  Used your best judgment on how much you want to prepare.
**Canned garbanzo beans are pre-cooked, so it takes less time to make the dish and they do not need to be pre-soaked overnight.  Raw garbanzo beans need to be soaked in a bowl of water overnight and will take longer to cook with the other ingredients.

Preparation:

-Garam masala: grind the cinnamon, cloves, and cardamoms in a coffee grinder.
-Fry garlic and onion (save a little for the end, though) with a tablespoon of ghee for a few minutes on medium heat.  When they start to turn a little yellow, add the garam masala mix and a teaspoon of turmeric (don't add too much -- if you do, your food will turn out really bitter).
-Stir and sautee for a few minutes, then add the chopped tomato.
-Stir the mix for about 2-3 minutes, then add the chickpeas and add the same amount of water (if you add a 15 oz can of chickpeas, add about 15 oz of water).
-Add a healthy amount of grated ginger to the pot (maybe about a handful), salt, pepper, and crushed red pepper to taste.
-Cover pot, cook on high heat, allow mixture to boil, then let simmer on medium or medium-low.
-I personally like to add a teaspoon of ghee to the dal after it's done boiling to add a bit more creaminess/sweetness.
-Leave on stove covered for at least an hour to an hour and a half to let the flavors come together.  Note: If you used raw chickpeas, leave on stove for longer (I'd recommend about 4 hours).
-Check the flavors about half an hour before you feel like the dal is done cooking.  Add anything you might find missing; I generally adjust salt and ginger levels at this point.
-Serve while hot, topped with a generous amount of fresh cilantro and a few pieces of raw onion.

Enjoy!

Wednesday, January 18, 2012

My happy place is...

...okay, so I have a lot of different happy places.  But I'm transported to one of them when I close my eyes while drinking a cup of freshly squeezed sugar cane juice, with grated ginger and lemon juice, in the warm sunshine.

...

I am the biggest baby when it comes to sports injuries...I'll openly admit it.  It makes me sad when something prevents me from being able to frolic outside in the sunshine (including the rain).  I love to be outside doing SOMETHING; one of my favorite relaxing and stress-reducing activities is running long distance.  It's so peaceful to be outside in the sunshine, soaking up Vitamin D, breathing in fresh air, observing the environment around me, releasing endorphins.  Running has invariably been one of the most important happy places in my life.  When I'm upset, stressed out, angry, I run.  I don't run FROM the pain.  I just run through it.  And when something prevents me from doing that, I find it difficult to deal with day-to-day stress.

So, yes, 'your whiny-ness' got injured this past Sunday running through Lullwater Park with Joe and Sasha.  I'm actually just fine now, but I'll probably won't be running for the next month.  Poor Joe and Yan Ping (my roommate) have been watching me mope for the last four days.  It's ridiculous, really.  But I finally decided yesterday to climb out of the hole I dug myself in (because, really?  Life could be so much worse).  I was finally mobile enough today to take the stairs down to my car and drive somewhere, so I did.  I put on my "happy shirt" (doesn't everyone have one of those??), marched (rather, hobbled) down the stairs, and drove to the salon to have my eyebrows, which majorly needed grooming, threaded.  I thought since I was already doing something nice for myself, I might as well go next door to the Patel Brothers to grab my FAVORITE juice of. all. time.  Sugar cane juice with freshly-squeezed lemon and ginger.

Smooth, cool, and refreshing, sugar cane juice is a common drink in India.  It is a wonderful way to cool off, plus it is full of nutrients and is actually quite good for you (in controlled quantities).  Mixing in tangy and savory flavors makes the drink a bit more balanced and even more refreshing in the hot summer months (although, it is great any time of the year).  People often add chaat masala or black salt (bit noon) to it as well, to tone down the sweetness of the drink.  When I first discovered that Patel Brothers was selling it at the little cafe attached to their grocery store, I went ballistic!  I couldn't believe I would now be able to get fresh sugar cane juice (squeezed right in front of me, by the way) year round!  You won't believe how much they charge, either -- $2 a cup.  And it's worth all of that and more.  I highly recommend that you try it if you live in Atlanta.  One cup of this stuff may literally change your life, folks.


Tuesday, January 17, 2012

Lamb burgers, and yes, we can get more decadent than that...avocado fries!

I know, I know.  I've pretty much fallen off the face of the planet with this blog.  Which is extremely unfortunate because it brings me so much joy to write about food.  Life has been extraordinarily busy as of late and will likely to continue to be that way for a while, but my goal is to write at least once a week about something food-related that brings me joy.

Speaking of joy, my sweet, loving partner bought me a $50 gift card to Whole Foods Market for Christmas.  No, neither of us normally shop at Whole Foods, but Joe knows that I love cooking and am sometimes limited financially.

Sometime last week, my friend Victoria sent me the link to a recipe for avocado fries.  Yes, avocado fries.  Nope, folks, it can't get much more decadent than that.  Creamy and rich on the inside, crunchy on the outside.  Mm-mm-mm-mm-mmmm.  Fried avocados, by the way, are a popular delicacy in Tex-Mex cuisine, often served in tacos or stuffed with cheese, vegetables, and/or meats.  Trudy's in Austin, Texas has the best stuffed avocado plate on the planet, while Torchy's Tacos, my favorite taco joint/food truck in the ENTIRE world, serves the fried avocado taco.  IT IS TO DIE FOR, people.  TO DIE FOR.

Anyway, as I mentioned, Victoria and I share a love (and longing) for Tex-Mex food, since we both go back so infrequently.  You can imagine our delight when we both found out about this recipe!!  We both promised to try it and report back our experiences.  So, Vic, this post is dedicated to you.

I decided to try out the recipe this weekend; it would be a stress-relieving treat, the end to a horrendously busy week (it was a I-feel-like-I-got-hit-by-a-bus kind of week, seriously).  So, Joe and I headed to Whole Foods late Saturday morning with one important mission: bring back ingredients for avocado fries (most of you that know me well know how I get when I embark on culinary missions).  On the way, I decided that nothing would go better with my avocado fries than a good 'ole-fashioned hamburger.  I thought about substituting turkey for the beef and going for a southwestern-style burger.  After much contemplation and open discussion in front of the WF meats section, we decided to purchase some ground lamb and make it a Greek-style burger.  Okay, I admit, so there's no specific theme to this meal, but you can't go wrong with a spicy lamb burger alongside rich, creamy avocado fries.

Not to toot my own horn, friends, but everything turned out absolutely delicious.  I marinated the lamb with a little garlic, onion, sea salt, crushed red pepper, feta cheese crumbles, and fresh dill and mint leaves.  After pan-frying the lamb patty, it was topped with a fresh tomato and feta salad and a strained yogurt sauce*, and served on a toasted kaiser roll.  It was spicy.  It was juicy.  The feta cheese gods (which I imagine to be fuzzy sheep for some reason) were doing a happy dance in my head!  The combination of textures -- the crunchy toasted bun with the juiciness of the patty and smooth texture of the "non-traditional tzatziki sauce" -- helped bring all of the flavors together into a delicious bite.  Oh, also -- a side note/tangent about dill.  Dill is one of my favorite herbs in the world (for the difference between herbs and spices, see this link), not only because it is one of the prettiest, with its bright green, wispy, feathery leaves, but also because it has one of the most unique flavors of all herbs.  It really is hard to put your finger on what dill really tastes (it just tastes like dill!), but when I eat it, I taste a slightly sweet flavor with a hint of tang that can really brighten a dish.  This may or may not be non-traditional, but I have a tendency to add it to any food that might have even a little bit of Grecian influence.  (see recipe below)

*I'm not going to pretend I'm being innovative here when I'm really not (unlike some Food Network show hosts...cough cough...Ina Garten).  I hesitate to call the "strained yogurt sauce" by its rightful traditional name, tzatziki sauce, because traditional Greek tzatziki sauce has grated cucumber and I just didn't have any laying around at home.  So, don't worry -- I am not trying to claim that I created this brilliant recipe from scratch by giving it another name!  I just stole it from somewhere else and forgot to add an ingredient.  (Also, if you know me well, you probably remember that I become unhealthily obsessed with a few foods for certain periods of time.  A few years ago it was soups.  For a few months it was tzatziki sauce...that phase is still lingering, hence the gushing about the strained yogurt sauce, i.e. non-traditional tzatziki sauce.)

Next came the avocado fries.  Guys, avocados are creamy and rich enough.  They really don't need much seasoning to begin with, so my opinion is to not overdo it.  I simply coated it with an egg batter, then bread crumbs, and deep fried for about 20-30 seconds, just as the recipe indicates.  My only (minor) negative feedback about the recipe is that topping with parmesan cheese really wasn't necessary, honestly (it was listed as optional, anyway).  But, you can never go wrong with parmesan cheese, I suppose.  The main problem with the avocado fries come mealtime was that none of us (Joe, my roommate, and myself) could eat more than a few before we became absolutely stuffed.  Nevertheless, they were delicious!  It makes my mouth water just thinking about them!  Overall: an easy, decadent appetizer to make for dinner guests that takes less than 20 minutes to put together.

RECIPE FOR LAMB BURGERS:

Ingredients:

-Kaiser rolls (or your favorite hamburger bun)
-Ground lamb (we bought about a pound and a half)
-2 small/medium tomatoes
-1 small onion
-2 cloves of garlic
-1 bunch fresh dill and mint leaves
-Salt/pepper to taste
-1/2 cup of unsweetened strained yogurt**
-1 fresh lime (don't use the pre-packaged lime juices!  they're not as good!!)

**If you don't have unsweetened Greek yogurt on hand (which I almost never do), just strain the yogurt in cheesecloth over a large bowl or in the sink.  It should take no more than 20 minutes.  If you don't have cheese cloth on hand (which I also almost never do), then you can use an old scrap of a clean cotton t-shirt -- it will do the trick just as well as your fancy old cheesecloth (and saves you some cash!).

Preparation:

-Meat: Marinate the ground lamb in a large bowl with 1 clove of finely chopped garlic, 1 slice of onion (I personally don't like too much onion in anything), some crumbled cheese (use your own judgment on how much to put in), salt/pepper to taste, crushed red pepper (also to taste), the squeeze of 1/4 of a lime, and a handful of finely chopped mint leaves and dill sprigs.  Set meat aside and let it marinade for about an hour.
-Tomato and feta salad: Combine 2 chopped tomatoes, 1/4 of a small, chopped onion, the squeeze of 1/2 a lime, salt and pepper to taste, a handful of chopped dill and mint leaves, and a generous serving of feta cheese :).
-Strained yogurt sauce (i.e. non-traditional tzatziki sauce): Combine 1 VERY finely chopped clove of garlic, half a cup of strained yogurt, generous amount of salt, squeeze of half a lime, and a handful of chopped dill.
-Toast both sides of your bun.  Apply yogurt sauce to one side of the bun and the meat patty on the other.  Top the patty with the tomato and feta salad.
-Enjoy!

Avocado fries, topped with parmesan cheese.

Tomato and feta salad, used as a topper for the lamb burger.

Tzatziki sauce minus grated cucumber.

DELICIOUS LAMB BURGERS!

The finished product.  It was delicious.